Creamy Cashew Protein Pasta

Some days you just need a little bit of cheese, and today was one of those days. There’s something about the creamy rich texture dairy adds to a dish that makes it oh so crave-able. I wanted to make a alfredo/mac & cheese dish, but I wanted something quicker and more nutrient dense then the traditional versions of those pastas.

2637AC8D-1147-48A3-91ED-12DB1B18B74E_1_105_c

BA6B4FC6-49E0-44B4-8D25-7C574E26CB48_1_105_c

Don’t get me wrong, there are many nutritional qualities about regular alfredo/mac & cheese, but I wanted something that packed just a little bit more of a nutritional punch. I’ve been trying to eat a bit more protein lately and the classic versions of those recipes just weren’t going to cut it.

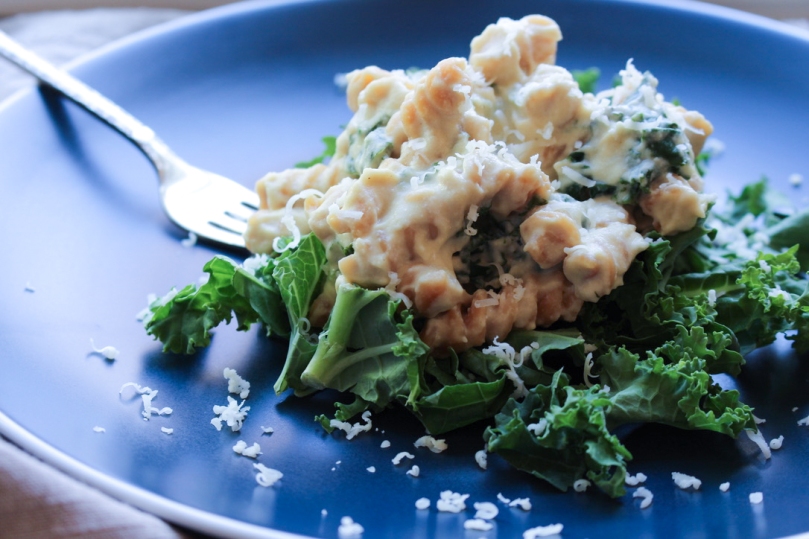
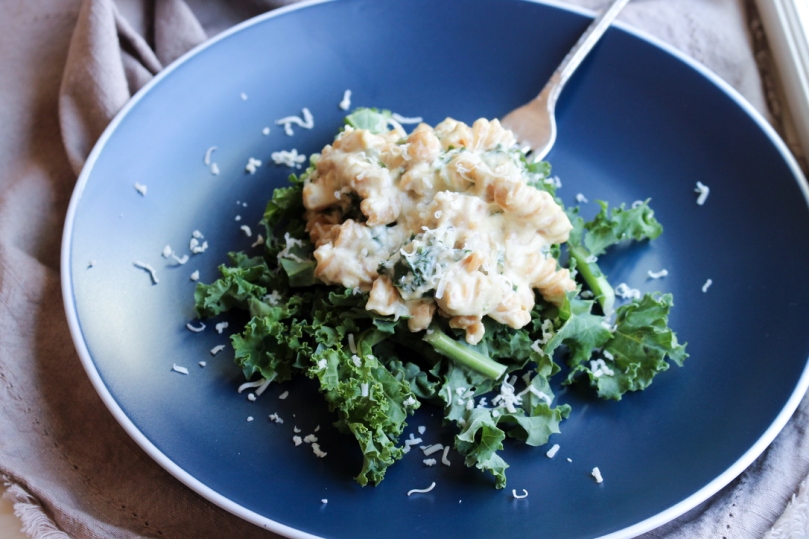
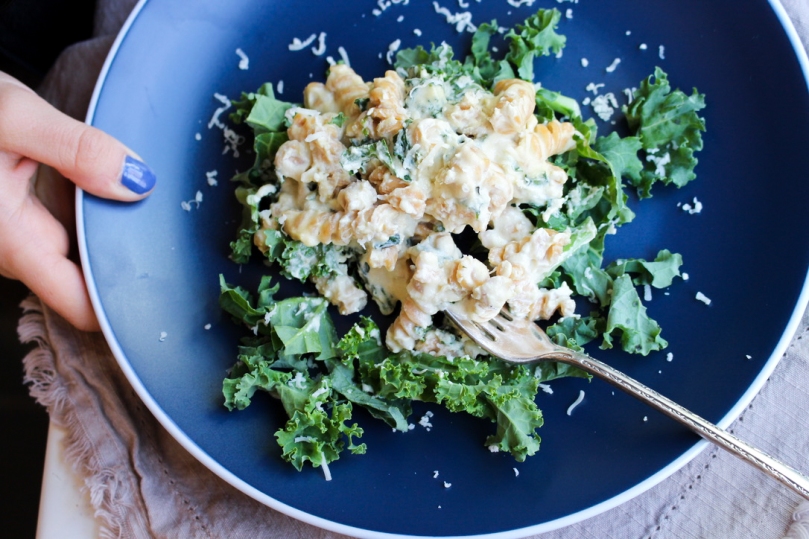
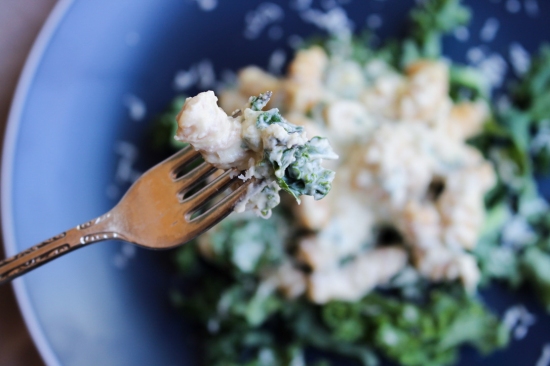
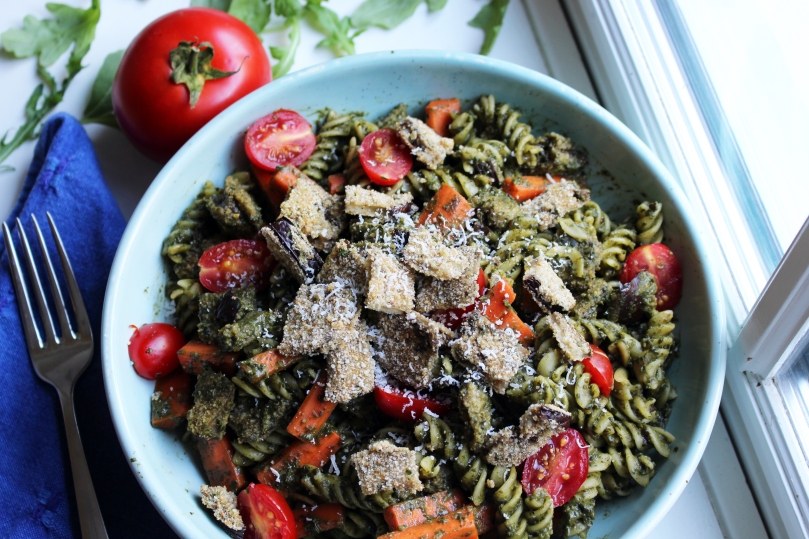
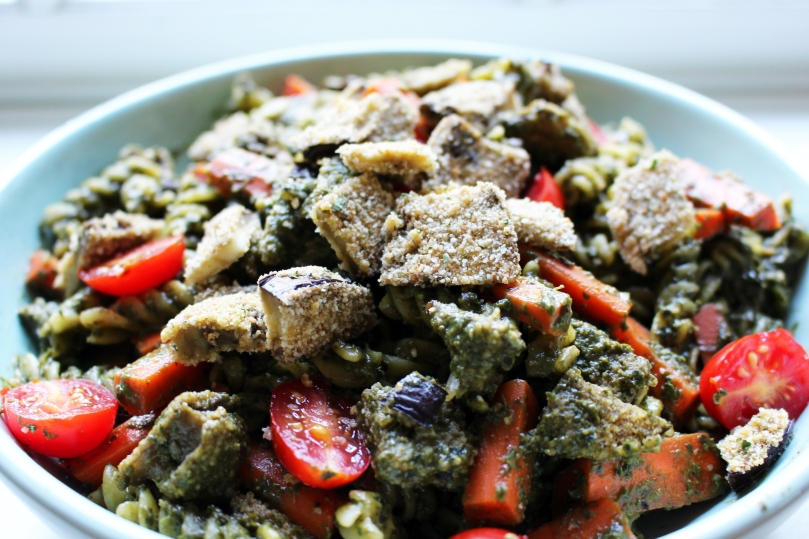
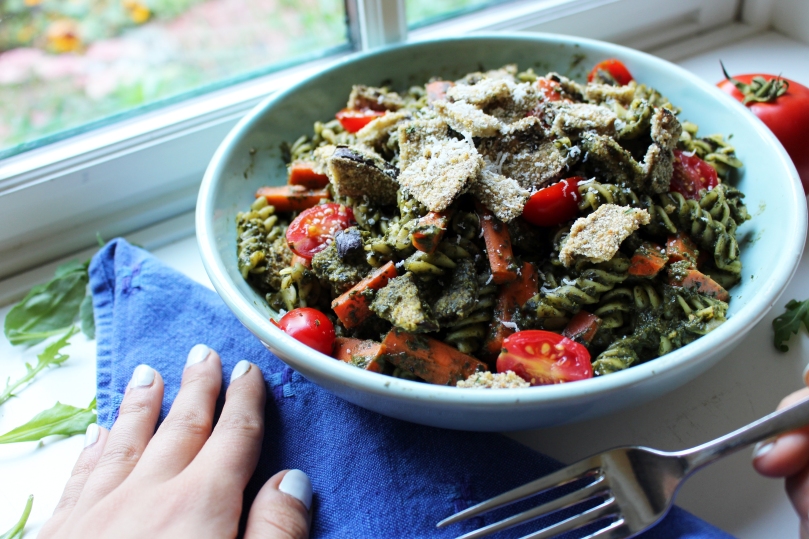
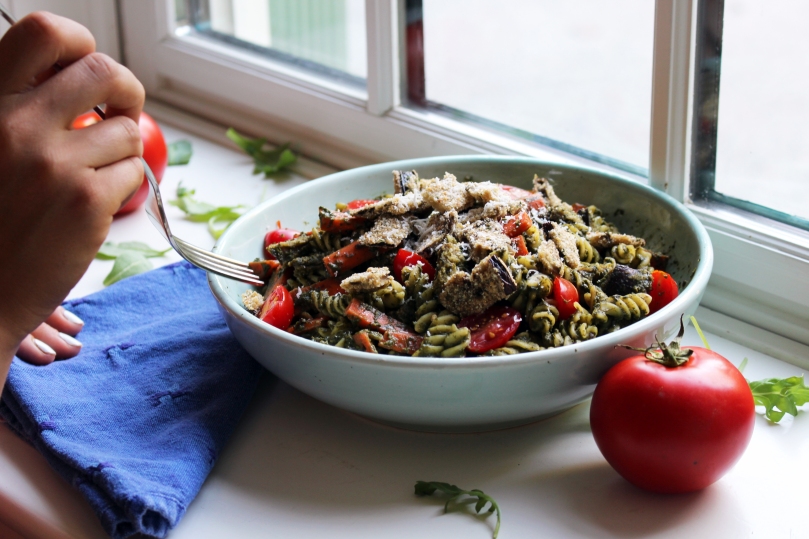
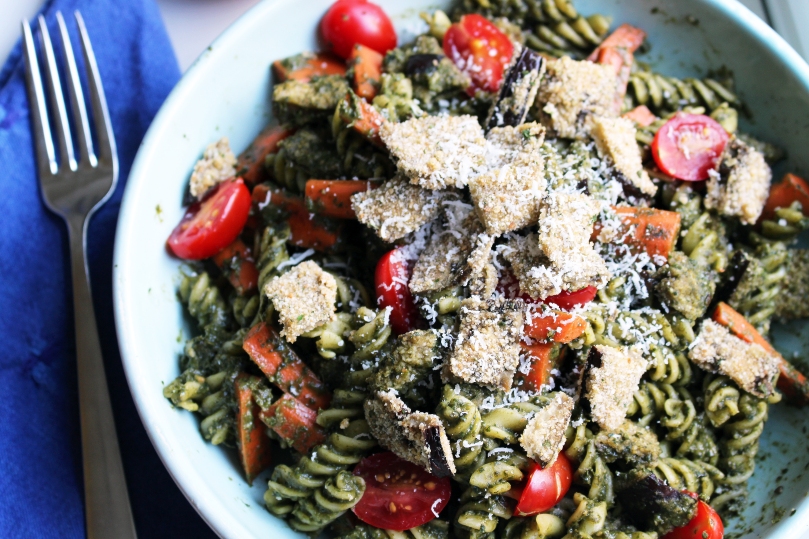
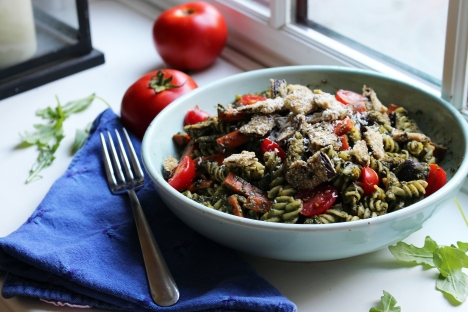
Thus, this pasta was born. Between the cashews, chickpeas, cheese, and kale, this dish packs a large amount of (vegetarian) protein into such a small space without compromising on any of the flavor.

7869F7F1-B1FC-45D7-A51E-80A7C4ADD6F1_1_105_c

Honestly, after you try this version of your favorite cheese laden pasta, you may not want to go back. You can thank me later.

Creamy Cashew Protein Pasta

  • Servings: 4-6
  • Print

Ingredients

  • 4 ounces of pasta
  • 1/2 cup cashews
  • 1/2 cup milk
  • 3/4 cups canned chickpeas, drained (about 1/2 a can)
  • 2 tablespoons olive oil
  • 1 ounce parmesan cheese (grate it after weighing)
  • 2 ounces cheddar cheese (grate it after weighing)
  • 1 clove garlic, minced
  • 1 teaspoon salt
  • 2 cups kale, chopped

Directions

  1. In a small pot, cover the cashews with water until there is about 1 inch of water covering them. Bring the water to a boil and reduce to low heat, cooking for 10-15 minutes until the cashews are tender. Once cooked, drain and set aside.
  2. While the cashews are cooking, bring a medium sized pot of water to boil over medium heat and cook the pasta according to the directions on the package. Before draining, reserve a 1/2 cup of the pasta water.
  3. In a food processor, combine the milk, chickpeas, and olive oil. Add the cashews, grated parmesan, grated cheddar, garlic, and salt. The sauce should be thick.
  4. Add the cashew sauce and kale to the pasta and mix until combine. The kale should shrink down from the heat of both the sauce and the pasta. If the sauce is too thick, add some of the pasta water until desired consistency is reached. Enjoy!

8E7231A8-A68D-43AD-8162-4D49F1BB1AC2_1_105_c

Chocolate Chip Crunch Cookies

Hi. Welcome back. Remember me? I can’t believe it’s 2020. The last couple months have been crazy busy, but I’m back and have lots of fun recipes lined up for the start of the new decade!2E260FC2-FF10-40A7-A86D-AF14648EAE10
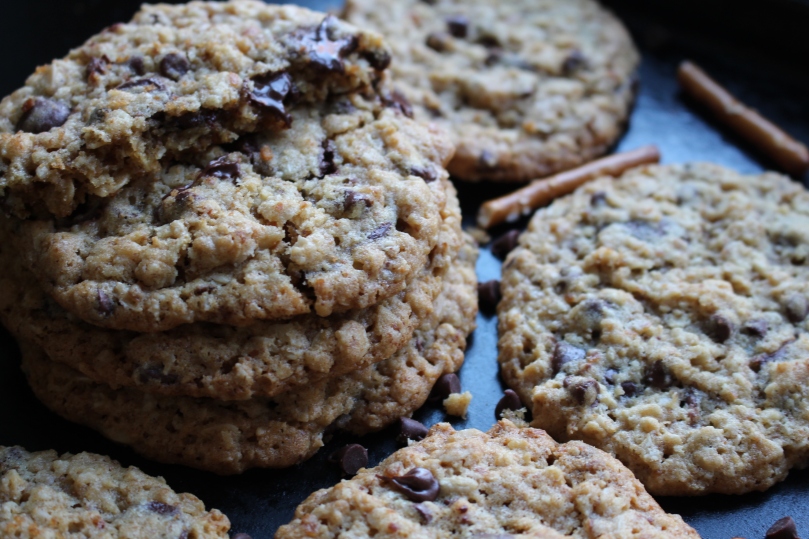
Starting today, of course. These cookies are addictively good and my twist on a classic oatmeal chocolate chip cookie. The difference between these babies and their boring (but beloved) counterparts — pretzels.

As you may recall from this post, pretzels aren’t really my jam. These cookies however, change that. The saltiness from the pretzel melds perfectly with the texture of the oats creating the perfect chocolate chip crunch cookie. If you’re going to bake one thing this long weekend, let it be these cookies. I promise you won’t regret it.
8BC2F7FF-AE55-4DBC-A614-2C620A789E89

C8CA5926-5848-415C-BEF9-6CB4AB1DD890

Chocolate Chip Crunch Cookies

  • Servings: 12-16
  • Print

Ingredients

  • 1/2 cup unsalted butter (room temperature)
  • 1/2 cup brown sugar
  • 2 tablespoons granulated sugar
  • 1 egg (room temperature)
  • 1/2 cup ground pretzels (I recommend using a food processor)
  • 1 and 1/2 cups rolled oats
  • 1/4 cup all purpose flour
  • 3/4 teaspoon baking powder
  • 1/2 teaspoon baking soda
  • 3/4 cups chocolate chips

Directions

  1. Preheat the oven to 350 degrees and line two baking sheets with parchment paper.  Set aside.
  2. Place the butter and both types of sugar in the bowl of a stand mixer and beat on high until light and fluffy.  Once fluffy, add the egg and beat until fluffy once again.
  3. In a medium bowl whisk the oats, ground pretzels, flour, baking powder, baking soda, and salt.
  4. With the mixer running on low speed, add the dry ingredients into the butter mixture until combined. Fold in the chocolate chips.
  5. Cover the dough and place in the refrigerator for at least 30 minutes.
  6. Remove the dough from the fridge and scoop about a tablespoon of dough onto the parchment paper.  Each cookie should be about two inches apart.
  7. Place in the oven and bake for 12-15 minutes.  Allow to cool for 5 minutes before transferring to a wire rack to cool completely.

0631778F-1811-496D-A80C-B519AC61E108

Pesto Eggplant Pasta

IMG_0781

Tonight’s post is a bit of a mouthful, but in a good way. I had just gotten home from picking up my farm share (one of best decision I’ve ever made) and was thinking about what I should make for dinner when the idea for this dish hit me. Arugula Pesto Eggplant Parmesan Pasta Salad. Taking another second to think however, I decided that that was a horrible name, and about three words too long, so I cut it in half. Having received several eggplants, a handful of basil, eggs, tomatoes, and some carrots in this week’s share I set to work.

IMG_0768

IMG_0792

If you didn’t already know, I love pesto. It’s one of my favorite foods. Scratch that, it is my favorite food. When I saw the basil in the farm share basket I knew that that was going to play some role in my dinner. There wasn’t enough basil, however, to make a full batch so I threw in some arugula, something that I love to do when I’m lacking a cup or two of basil. Adding arugula to your pesto sneaks in an extra vegetable (picky eaters you can thank me later) and packs this meal full of vitamins and nutrients, while still maintaining that basil flavor. If you don’t have the arugula, don’t sweat it, just add more basil and make it a normal pesto!

IMG_0790

This dish is super easy, delicious, and takes just under an hour so if you’re short on time, it’s the perfect meal for you! It makes a fair amount, but I’m telling you the leftovers are delicious because the bread crumbs soak up the pesto the longer that they sit. You’re welcome in advance.

IMG_0782

Pesto Eggplant Pasta

  • Servings: 4-5
  • Print

Ingredients

  • 1 small eggplant
  • 1 egg, beat with salt and pepper
  • 1 – 1 1/2 cups bread crumbs
  • 1 1/2 cups basil
  • 1/2 cup arugula
  • 2 tablespoons pine nuts
  • 1 cloves garlic, minced
  • 1/8 teaspoon salt
  • 1-2 tablespoons olive oil
  • 1 cup grated parmesan
  • 8 ounces pasta (I used fusilli but you can do whatever shape you want!)
  • 3 carrots, sliced into sticks
  • 1/4 cup grape tomatoes
  • Grated parmesan, to taste

Directions

  1. Preheat the oven to 350 degrees.
  2. Slice the eggplant into thin slices, about a 1/2 inch thick. Dip each slice into the egg mixture and then into the bread crumbs. Place the eggplant slice on a baking sheet and repeat until you are all out of eggplant. Bake for 12 minutes, flip each eggplant slice onto the other side and bake for another 12 minutes.
  3. While the eggplant is baking, combine the basil, arugula, pine nuts, garlic, and salt in a food processor. Drizzle in the olive oil until the mixture reaches a smooth and not chunky consistency. Pour the mixture into a bowl and fold in the grated parmesan. Set aside.
  4. Bring a medium pot of water to boil and cook the pasta according to the package. Add the carrots into the water when the pasta has about 5-6 minutes left. Before draining the water, reserve about 1/3 cup of the water.
  5. Once the eggplant is finished cut each slice into 1/4 inch squares.
  6. Combine the pasta, carrots, eggplant, grape tomatoes, and pesto in a bowl. Pour in the pasta water until the dish reaches the desired consistency. Enjoy!

IMG_0783

Healthier Blackberry Scones (refined sugar free!)

Scone1

Every summer around late August my family is forced to get creative with blackberries. As the proud owners of a wild and unruly blackberry bush, our garden is flooded with the tiny berries in the late summertime. From crisps to cakes we have used these blackberries for pretty much everything over the years, but my favorite has always been scones. I don’t know why but I’ve always felt like blackberries and scones go incredibility well together.

Scones4

Scones2

When I woke up this morning, however, I was craving something a bit healthier than a regular scone. Don’t get me wrong, the crisp crunch of a buttery scone sprinkled with sanding sugar and brushed with a sizable amount of heavy cream is one of my favorite tastes, but sometimes you want something a little bit healthier. That’s why today’s recipe is refined sugar free. When searching online for a scone recipe without sugar to see if it could be done, the results that came up were honestly, disappointing. So I set out to fix that and thus this recipe was born. The maple syrup adds a sweetness, but with roughly 1.5 teaspoons per scone, it’s not overwhelming amount per scone (and it’s unrefined!).

Healthier Blackberry Scones

  • Servings: 9-10
  • Print

Ingredients

  • 1/2 cup unsalted butter, cold
  • 1 cup all purpose flour
  • 1 cup whole wheat flour
  • 1 cup rolled oats + 1-2 tablespoons
  • 1 tablespoon baking powder
  • 1/4 teaspoon salt
  • 1/3 cup buttermilk + 1-2 tablespoons
  • 1/3 cup maple syrup
  • 1 egg
  • 1/4 teaspoon vanilla
  • 1 lemon’s zest
  • 1 cup blackberries
  • 1/2 cup crushed pecans (optional, I find they add a nice texture)
  • Bake 18-22 Minutes 400 degrees

Directions

  1. Preheat the oven to 400 degrees and line a baking sheet with parchment paper, set aside.
  2. Grate the cold butter and place in the fridge to keep cool until needed.
  3. In a medium sized bowl, whisk together the flours, 1 cup oats, baking powder, and salt, set aside.
  4. In a liquid measuring cup or small bowl whisk together the 1/3 cup buttermilk, maple syrup, egg, vanilla, and lemon zest.
  5. Pour the buttermilk mixture into the flour mixture and mix until just combine. Add in the blackberries and pecans (if using).
  6. Drop about a 1/4 cup of dough onto the parchment paper and place each scone about 3 inches apart. Brush with the remaining buttermilk and sprinkle the remaining oats on top.
  7. Bake for 18-22 minutes until the scones begin to brown. Allow to cool for 5-10 minutes and enjoy!

Bonus Tip:

I made these twice, once without glaze and once with and I think that the glaze can add a little extra something. Although adding the glaze adds refined sugar to the recipe, I think that it’s worth it 🙂 To make the lemon glaze combine the juice from 1/2 a lemon with 1/2 cup powdered sugar and 1-2 teaspoons of water. Drizzle on top of the cooled scones and allow to dry.

Hope you guys try this recipe and like it, I’ll probably have some new blackberry recipes scattered throughout the year from all the blackberry testing I’m doing now!

Scones5

Mascarpone Blueberry Bars

I have a confession to make. I love organization. Between color coding, labeling, sorting, to me there’s nothing more exciting than that moment when everything comes together and is easily accessible. Whenever I get a little bit busy, however, this love for organization seems to get shoved to the bottom of my to do list and all my previously worked out systems seem to get all out of wack.

+IKAoUymTWu24wjrLuQQng_thumb_15.jpg

tkpxYPpWSnSj5kJc6BAQKA_thumb_16.jpg

This recipe, for instance, I first tested in early February. That’s right, the February that was three whole months ago. After the initial test I tweaked it a little bit to adjust the flavoring, but within a few days it was ready to go and should have been posted in early March. Well, right around March life got a little bit busy and I decided to put off writing up the post for one week. That one week turned into two and before I knew it it was May and my last blog post was from three months ago, which just isn’t right. So my sincerest apologizes, hopefully such a lengthy hiatus will not happen again.

cLscFJPzRrmMO5G%nEjLIw_thumb_19.jpg

Now, onto these bars. They’re creamy, slightly sweet, and have the perfect amount of pop from the blueberries. Complete with a sugar cookie crust, these bars practically melt in your mouth bite after bite, making them the perfect spring dessert.

BmCUSPfBRyWd5wwfSHQSpA_thumb_13.jpg

These bars look super complex and fancy, but really they couldn’t be more simple. Whip up the crust and mascarpone layer, pour them together, bake, and voila! You’re done!

Mascarpone Blueberry Bars

  • Servings: 9
  • Print

Ingredients

  • Crust:
  • 1/2 cup unsalted butter softened
  • 2 tablespoon mascarpone
  • 1/2 cup granulated sugar
  • 1 cup all purpose flour
  • 1/8 teaspoon salt
  • Filling:
  • 1/3 cup mascarpone
  • 1/4 cup sugar
  • 1 egg
  • 1/2 teaspoon vanilla extract
  • 1/2 cup blueberries

Directions

  1. Preheat an oven to 350 degrees and grease a 8inch square pan. Line it with parchment paper and set aside.
  2. In a small bowl beat the butter, mascarpone, and granulated sugar until combine. Add the flour and salt and mix until a ball of dough forms.
  3. Press the crust into the bottom of the prepared ban and set aside.
  4. In a medium bowl whisk together all of the filling ingredients except the blueberries. Once combine, fold in the blueberries.
  5. Pour the filling mixture over the crust topping with additional blueberries for aesthetic.
  6. Bake for one hour or until the mascarpone layer is set. Allow to completely cool before cutting and enjoy!

s44lreBRTciXedWlD6T+RA_thumb_18.jpg

Banana Bread Coffee Cake

Every week without fail I buy a bunch of bananas. Every week without fail I eat one and watch the rest of the bananas in the bunch rapidly brown until they are far past an edible standard. Hence, every week without fail I whip up some combination of banana bread and banana pancakes. As much as I love these two staples, they can get a little bit repetitive when baked on repeat week after week. It’s gotten to the point where I’ve memorized both recipes and can probably whip them up with my eyes closed. Yes, I like them, but when my bananas turned brown this week I knew that it was time for a change.
fullsizeoutput_4

fullsizeoutput_2
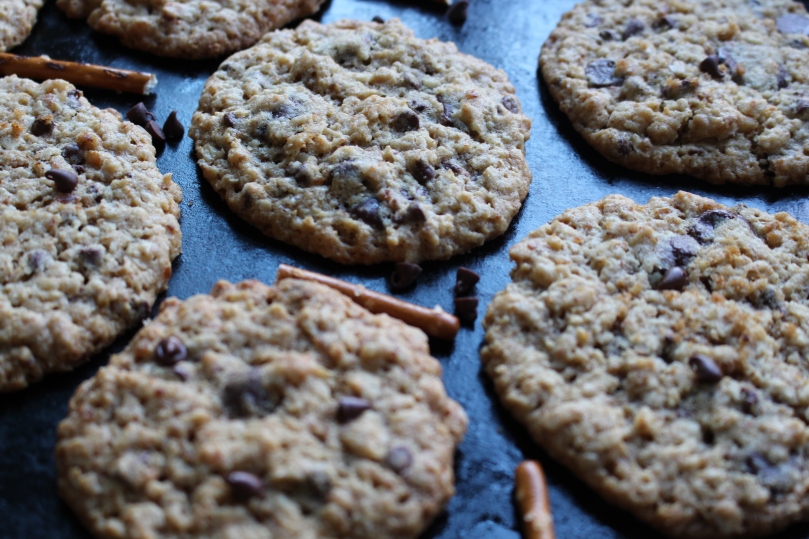
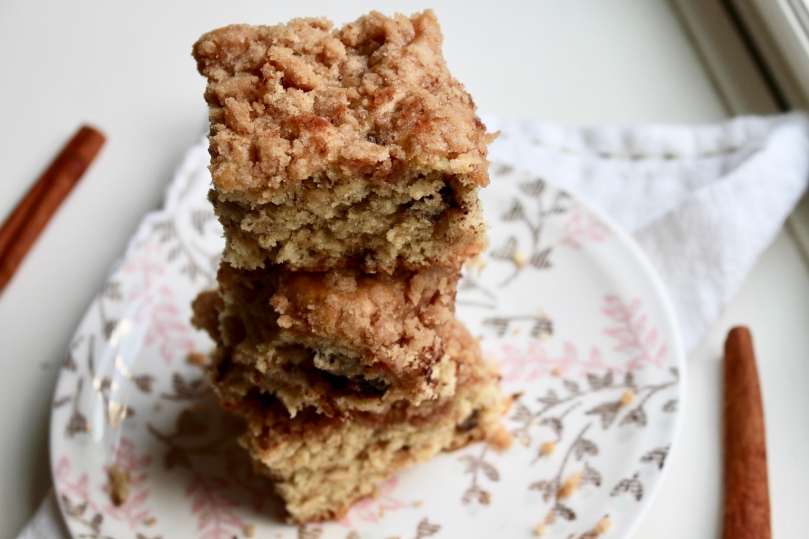
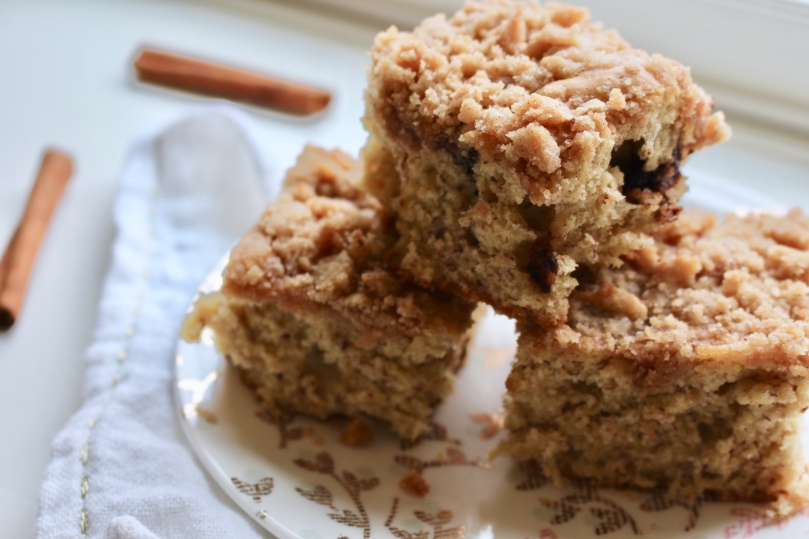
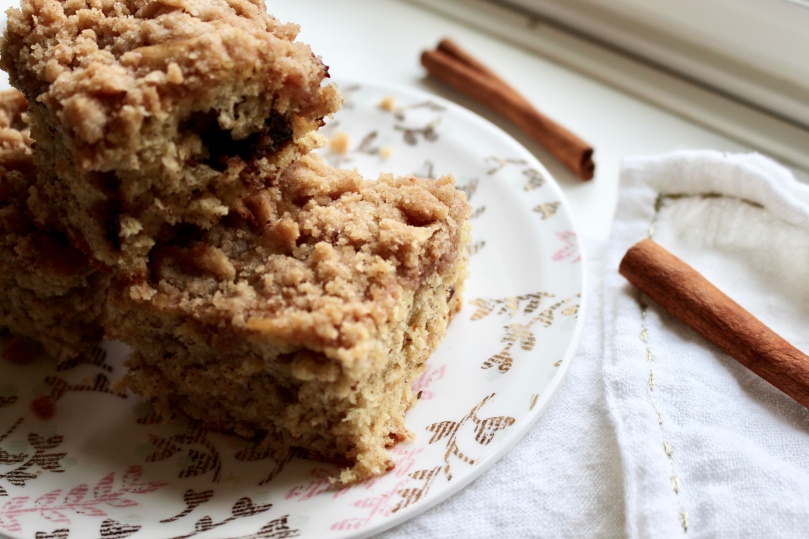
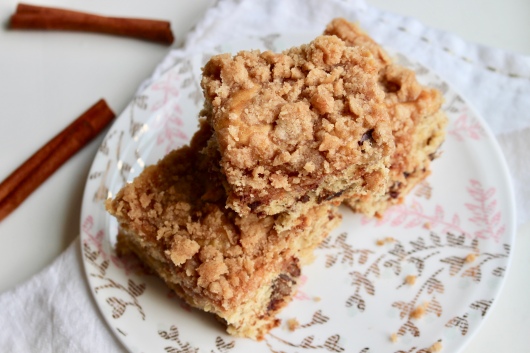
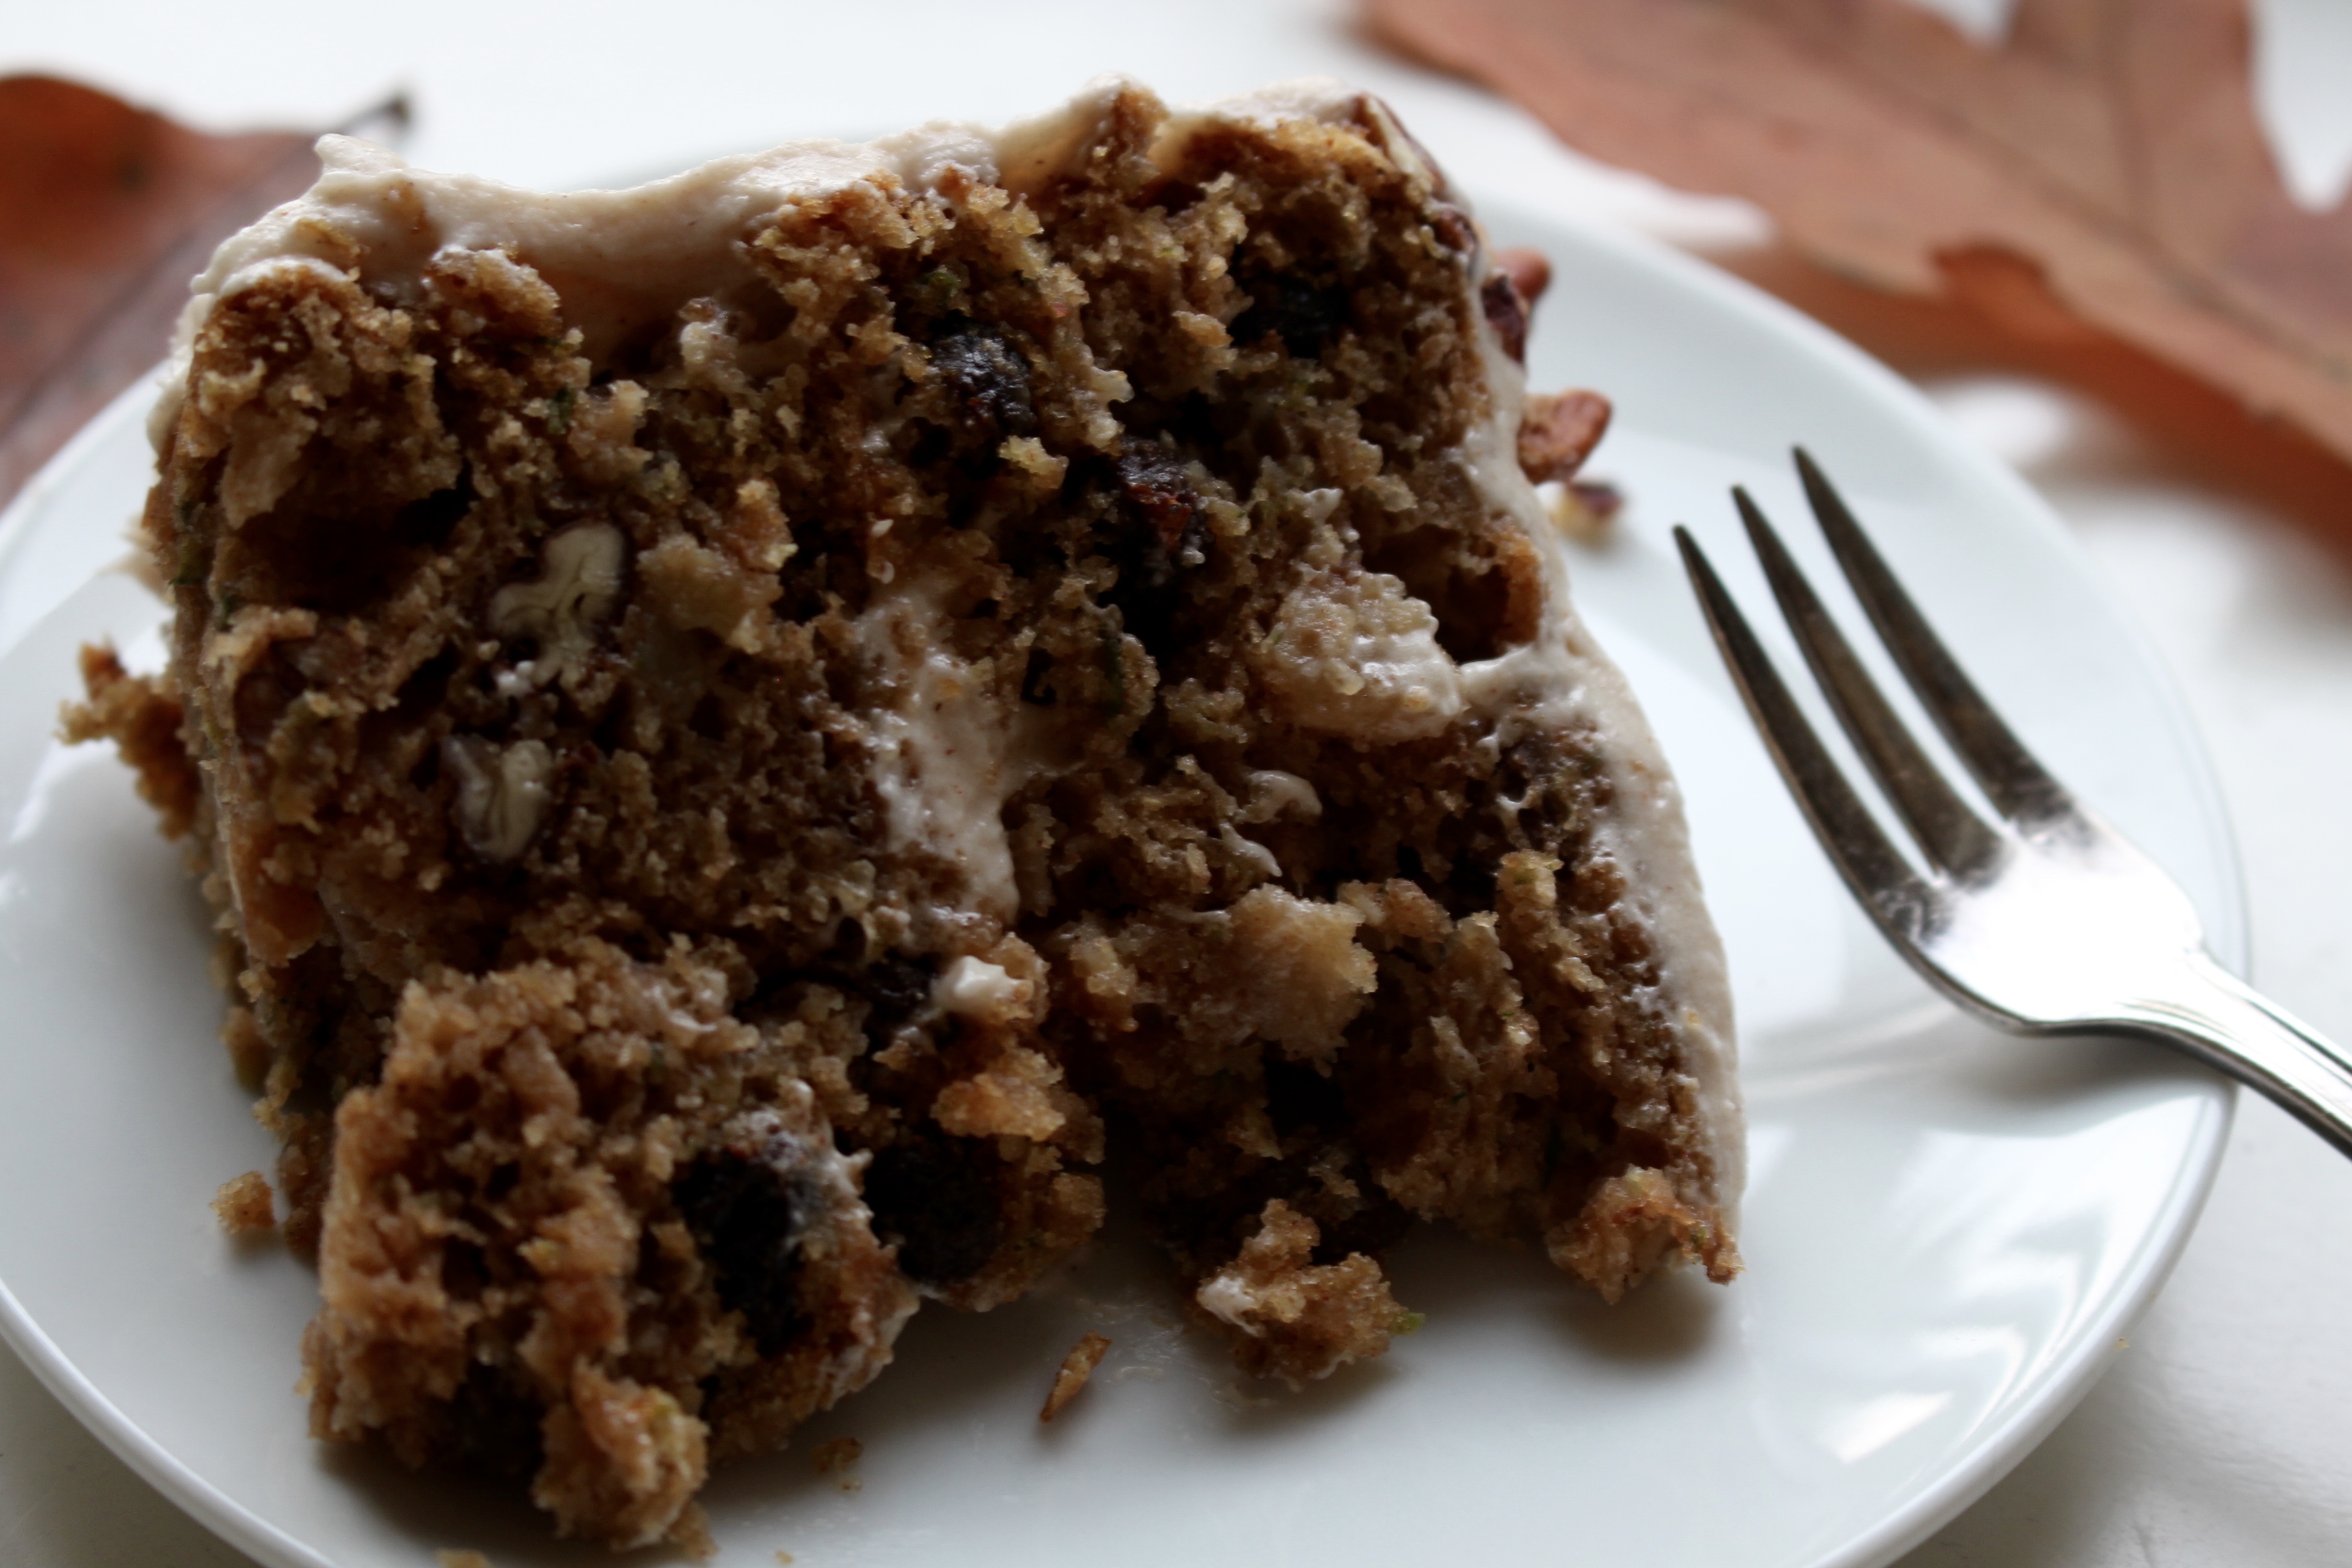
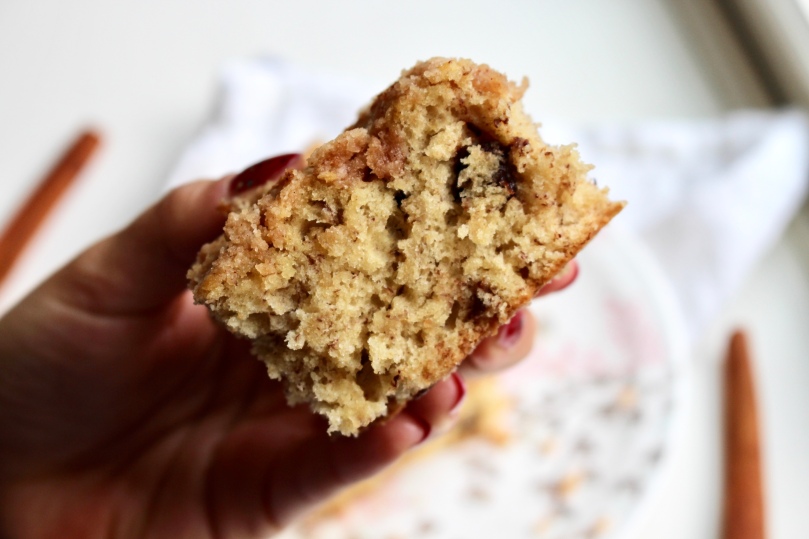
Enter this banana bread coffee cake. With a moist crumb and a lovely cinnamon streusel on top, it’s the perfect way to shake up my weekly routine. Paired with a warm cup of caffeine, this coffee cake makes for the perfect weekend indulgence, especially now that the weather is turning for the colder and snowier.

fullsizeoutput_c
fullsizeoutput_b

I will definitely be baking this crowd pleaser for some upcoming brunches and breakfasts I have on my schedule. Maybe I’ll even add it to the banana baking rotation to keep things fresh!

Banana Bread Coffee Cake

  • Servings: 16
  • Print

Ingredients

    • For the Coffee Cake: 
    • 2 cups all purpose flour
    • 1/4 cup whole wheat flour
    • 1 1/2 teaspoon baking powder
    • 1/2 teaspoon baking soda
    • 1/4 teaspoon salt
    • 1/4 cup unsalted butter softened
    • 3 bananas mashed
    • 1/2 cup granulated sugar
    • 1 egg
    • 1 teaspoon vanilla
    • 1/3 cup milk
    • For the Streusel:
    • 1/2 cup all purpose flour
    • 1/4 cup unsalted butter, melted
    • 1/4 cup brown sugar
    • 1/4 cup granulated sugar
    • 1 teaspoon cinnamon

Directions

  1. Preheat the oven to 350 degrees. Line a 9 by 9 square baking pan with parchment paper.
  2. In a medium bowl whisk together the flours, baking powder, baking soda, cinnamon, and salt. Set aside
  3. In the bowl of a stand mixer or with a handheld mixer, beat the butter, banana, and sugar until light and fluffy – about two minutes. Add the egg and beat until combine.
  4. Alternate adding the flour mixture and the milk with the butter mixture, starting and ending with the flour.
  5. In a small bowl combine all of the streusel ingredients and mix until combine.
  6. Pour the batter into the prepared pan and crumble the streusel on top. Bake for 45-60 minutes until a toothpick comes out clean. Allow to cool for 5 minutes in the pan before moving to a wire rack to cool completely.
  7. Enjoy!

Note: For additional flavor you can add up to 1/2 cup of mix-ins (like pecans, walnuts, chocolate chips, ect.). Fold the additional ingredients in after the batter is combine, but be careful not to over mix.

fullsizeoutput_7

Gingerbread Bundt with a Cream Cheese Brown Butter Glaze

Merry Christmas Eve!

I touched on how much of a fan I am of the holidays in last month’s post, but I don’t think I stressed it enough. Something about the cheerful spirit, delicious food, and festive weather just makes me so happy. Currently, it’s snowing, I’m curled up on my coach with a cup of peppermint tea, my laptop, and my pup, with a cake for a client in the oven. The whole house smells of Christmas between the evergreen tree in the living room and the lovely aroma of nutmeg wafering it’s way over from the oven. I honestly don’t think that it gets any better than this.

IMG_0585

IMG_0591

For Christmas, my area of expertise has always been dessert. Last year, I whipped up a raspberry chocolate chip cake for Christmas Eve and a chocolate peanut butter fudge cake for Christmas, because if you haven’t met my family we need multiple desserts for every holiday (but that’s a story for another occasion). This year, I wanted to do something a little more wintery for Christmas Eve, but I wasn’t sure exactly what. Last Christmas, I was given a beautiful new bundt pan, so I knew I wanted to use that but I was stuck on what flavor to make it. A few days later, I stumbled upon a brand new jar of molasses in my pantry, I knew that it just had to be gingerbread.

IMG_0592

IMG_0590

If you’re looking for something to make for your Christmas dinner, look no further because I’ve got you covered. This gingerbread bundt is incredibly moist and easy. Complete with a cream cheese brown butter glaze, it’s sure to wow a crowd with the complex nutty notes that brown butter brings, without eating up hours of your day. Cleanup is minimal, especially since the glaze is made in a singular pot instead of multiple, which is just what you want during the holidays.


I hope you all have a Merry Christmas! See you in the New Year!

Gingerbread Bundt with a Cream Cheese Brown Butter Glaze

  • Servings: 16
  • Print

Ingredients

    • For the Cake: 
    • 3/4 cup unsalted butter, softened
    • 1/2 cup granulated sugar
    • 1/4 cup brown sugar
    • 4 eggs
    • 1/2 cup molasses
    • 3 cups all purpose flour
    • 1 1/2 teaspoon baking powder
    • 1/2 teaspoon baking soda
    • 2 teaspoon cinnamon
    • 2 teaspoon ginger
    • 1/2 teaspoon allspice
    • 1/2 teaspoon clove
    • 1/2 teaspoon salt
    • 1/2 cup buttermilk
    • For the Brown Butter Glaze:
    • 1/4 cup butter
    • 2 ounces cream cheese, softened to room temperature
    • 1/4 – 1/3 cup milk
    • 1 – 1 1/2 cup confectionary sugar

Directions

  1. Preheat the oven to 350 degrees.  Grease a bundt pan very well, making sure to get every crevice of the pan.
  2. In a medium bowl whisk together the flour, baking powder, baking soda, cinnamon, ginger, allspice, clove, and salt. Set aside
  3. In the bowl of a stand mixer or with a handheld mixer, beat the butter and sugar until light and fluffy – about two minutes.  Add the eggs one at a time, mixing until combine. Add the molasses and mix until combine.
  4. Alternate adding the flour mixture and the buttermilk with the butter, starting and ending with the flour.
  5. Pour the batter into the prepared pan and bake for 45-60 minutes until a toothpick comes out clean.  Allow to cool for 5 minutes in the pan before moving to a wire rack to cool completely.
  6. Over medium heat, melt the butter and leave it there until little brown specs begin to form on the bottom of the pan, about 5-7 minutes.
  7. Once the butter is browned, remove from the heat and whisk in the cream cheese until mixed together. The cream cheese might be a little clumpy at first, but the heat from the butter will melt it as a you stir, allowing the mixture to come together.
  8. Once combine, add the milk and then 1 cup confectionary sugar. If the glaze seems too runny, add up to 1/2 cup more of confectionary sugar. If it seems too thick, add more milk.
  9. Once the bundt is cooled, drizzle the glaze on top, and enjoy!

IMG_0571.JPG

Caramel Turtle Cake

Happy Thanksgiving!

Holiday season is upon us, and with that, the baking season descends as well. My cupboards and pantry are stacked and loaded for all of the cookies, tarts, pies, and cakes that will be made in the next month. I’ve got Christmas music already blaring and my oven is preheated to 350 degrees almost all day long. The only thing not ready for the holidays is my cleaning skills! There will definitely be lots of flour spilled, cookies dropped, and messes made this season. After all, it’s only been two days in and I’ve already dropped two cupcakes and created a powdered sugar snowstorm in my pantry! Guess I’ll just have to buy some paper towels in bulk and keep the vacuum ready at all times.    

img_0555

Jokes aside, I’ve been ready for the holidays for months with a long list of recipes. I’ve been meaning to test all of them out, and what better time then the season of giving? When I sat down to decide what type of dessert I was going to make this year for everyone’s favorite food orientated holiday, I knew I wanted to pick one of the recipe ideas that was a little different. I wanted it to be a cake, but I just wasn’t sure what type, as there were several scrawled out on my list. 

img_0556img_0554

After I realized the lack of chocolate cake recipes on here, I knew that it absolutely had to be chocolate. And from there it was decided that this beauty, a caramel turtle cake, would be my Thanksgiving cake.

img_0557

A chocolate cake filled with a caramel pecan buttercream and topped with a bittersweet chocolate frosting, this cake is definitely not one you want to miss out on. The bitterness of the chocolate paired with the sweet caramel creates a perfect mix of flavors especially when combine with the pecans. In my mind, this showstopper can turn any regular meal into a feast.


Caramel Turtle Cake

  • Servings: 8
  • Print

Ingredients

    •  
    • For the Cake: 
    • 1/2 cup unsalted butter, softened
    • 1 cup sugar
    • 2 eggs
    • 1 teaspoon vanilla
    • 1 3/4 cup all purpose flour
    • 1/2 cup dutch cocoa powder
    • 1 teaspoon baking powder
    • 1 teaspoon baking soda
    • 1/2 teaspoon salt
    • 1/3 cup fresh coffee or hot water
    • 1/2 cup buttermilk
    • For the Frosting/Filling:
    • 1 cup unsalted butter
    • 1 1/2 cup confectionery sugar
    • 4 ounces unsweetened chocolate, melted
    • 3 tablespoons heavy cream
    • 1/4 cup caramel, plus more for decoration (I used this recipe)
    • 1/4 cup chopped pecans, plus more for decoration

Directions

  1. Preheat the oven to 350 degrees.  Grease and line two 6″ cake pans with parchment paper.
  2. In a small bowl whisk together the flour, cocoa powder, baking soda, baking powder, and salt.  Set aside.
  3. In the bowl of a stand mixer or with a handheld mixer, beat the butter and sugar until light and fluffy – about two minutes.  Add the eggs and vanilla extract, mixing for another minute or two.
  4. Alternate adding the flour mixture and the buttermilk with the butter, starting and ending with the flour.
  5. Add the coffee and mix until just combine.
  6. Pour the batter into the prepared pans and bake for 45-55 minutes until a toothpick comes out clean.  Allow to cool for 5 minutes in the pan before moving to a wire rack to cool completely.
  7. To make the frosting, whip the butter and powdered sugar with a stand mixer or handheld mixer until combined.  Take a 1/4 cup of the mixture and set aside in a separate bowl for the caramel filling.
  8. To the remaining butter mix, add the unsweetened chocolate and the heavy cream and whip until combined.  If desired, adjust the sugar, chocolate ratio to taste.
  9. Taking the set aside 1/4 cup of frosting, mix 1/4 cup of caramel into the frosting until the mixture is homogeneous. Mix in the chopped pecans.
  10. Once the cake is cooled, spread the caramel buttercream on the first layer and then place the second layer on top.  Frost the rest of the cake with chocolate buttercream however you desire.  I drizzled caramel and some melted chocolate over mine along with some more pecans, but overall I found that it didn’t alter the taste at all.  Enjoy!

IMG_0563

Healthy Apple Spice Cake

Wow. I feel like I blinked and all of a sudden it’s fall. The leaves seemed to have changed overnight and the weather is suddenly chilly (most of the time). I have pulled out my winter boots as well as all my chunky knit sweaters to keep warm. I even have started drinking an extra cup of tea in the morning.

IMG_0542

Even though it snuck up on me, I am more than ready for fall flavors. Curling up with a warm mug of spiced goodness, crunching on toasted pumpkin seeds. And of course, all the apples, cinnamon, nutmeg, oh my. And today’s recipe has all of those things with a healthy twist.

IMG_0548

As you all know from this recipe and this recipe I love to sneak vegetables into my baked goods. Not only does it add flavor and moisture, but you get the benefits of another serving of vegetables. While eating cake, I might add. If that’s not a win, I don’t know what is.

IMG_0547

img_0532.jpg

Today’s cake is perfectly fall and very addicting. Luckily, it’s the perfect petite size, so if you end up eating it all I won’t blame you. Plus it’s got zucchini as well as whole apples so it’s basically good for you.

Healthy Apple Spice Cake

  • Servings: 8
  • Print

Ingredients

    • For the Cake:
    • 1/2 cup unsalted butter, softened
    • 2/3 cup brown sugar
    • 1/2 cup granulated sugar
    • 2 eggs
    • 1 teaspoon vanilla
    • 2/3 cup all purpose flour
    • 1 cup whole wheat flour
    • 1 teaspoon baking powder
    • 1/2 teaspoon baking soda
    • 2 teaspoon cinnamon
    • 1/2 teaspoon nutmeg
    • 1/8 teaspoon cloves
    • 1/2 teaspoon salt
    • 1/2 cup milk
    • 1 1/2 cup shredded zucchini
    • 1 1/2 cup chopped apples
    • 1/4 cup raisins
    • 1/4 cup chopped pecans
    • For the Frosting:
    • 8 ounces cream cheese, softened
    • 6 tablespoons unsalted butter, softened
    • 2 1/2 cups confectionary sugar
    • 3/4 teaspoon cinnamon

Directions

  1. Preheat the oven to 350 degrees.  Grease and line two 6″ cake pans with parchment paper.
  2. In a small bowl whisk together the flours, baking powder, baking soda, spices and salt.  Set aside.
  3. In the bowl of a stand mixer or with a handheld mixer, beat the butter and sugars until light and fluffy – about two minutes.  Add the eggs and vanilla extract, mixing for another minute or two.
  4. Alternate adding the flour mixture and the milk mixture with the butter, starting and ending with the flour.
  5. Fold in the shredded zucchini, chopped apples, raisins and pecans being careful not to over mix.
  6. Pour the batter into the prepared pans and bake for 30-45 minutes until a toothpick comes out clean.  Allow to cool for 5 minutes in the pan before moving to a wire rack to cool completely.
  7. To make the frosting, whip the butter and cream cheese with a stand mixer or handheld mixer until combined.  Add the powdered sugar and cinnamon.
  8. Once the cake is completely cooled, frost it and top with extra pecans and raisins. Enjoy!

IMG_0552


Spicy Chickpea and Grilled Peach Salad

As I mentioned in this post, I’ve been trying to cook more.  This has led to many nights of failed meals as I was too ambitious with my flavor combinations.  See, when I decide that I want to be good at something, I no longer just want that skill, I need that skill.  So, as many of you can probably guess, when I set out to get better at cooking I dove head first into the complex recipes.  I believed that because I could make pasta, I knew the basics.

Boy was I wrong.

One of my favorite examples of my untimely ambition happened to fall a few years ago on my mother’s birthday.  With only an hour until the meal, I decided that I was going to cook a lovely Italian dinner complete with homemade ravioli and arancini.  Now I had made homemade pasta plenty of times, it was something that I knew well.  I also knew that they took hours to prepare, and yet I still decided to try to make them in only one.  Arancini, was a bit of a different story.  I had never tried to cook something that complex.  In my mind, however, it didn’t seem that complicated and any little hiccups I would figure out along the way.

IMG_0106

I bet you can tell where this is going.  Ravioli on the floor, flour coating every surface possible and rice balls badly burnt on the outside and freezing cold in the middle.  Not exactly the lovely Italian meal I had imagined.

So after this failure, I reevaluated my situation and skill set and decided to take a step back.  I wasn’t giving up, per say, just deciding to work my way up to that Michelin star worthy level of cooking instead of starting there.

And with that, let’s move on to today’s dish.  A fairly simple meal, that’s healthy with semi-complex notes.  The contrast of the caramel-y notes in the grilled peaches mixed with the spice of the chickpeas sounds a little bizarre, but works like a charm.  This dish will wow guests at your next dinner party or liven up a dull week, in just 30 minutes too!

IMG_0098

Spicy Chickpea and Grilled Peach Salad

  • Servings: 4
  • Print

Ingredients

  • 6 cups fresh green (I used a yummy mix complete with some fresh herbs)
  • 1 16 ounce can chickpeas
  • 1 tablespoon olive oil
  • 1 teaspoon cumin
  • 1 teaspoon paprika
  • 1 teaspoon chipotle powder
  • 2 peaches (cut into slices)
  • 2 ears of corn
  • 2 avocados (sliced and cubed)
  • 1 lime (optional)

Directions

  1. Preheat the oven to 350 degrees.
  2. In a small bowl coat the chickpeas with the olive oil, cumin, paprika, chipotle powder and a pinch of both salt and pepper.
  3. Pour chickpeas onto a rimmed sheet pan and bake for 10-15 minutes until crispy.
  4. While the chickpeas are baking, heat a grill pan over medium heat.  Spray with non-stick cooking spray and then place the peach halves and the corn on the pan.  Cook each side of the peaches and corn for about 3-5 minutes until some nice char marks have formed.
  5. After allowing to cool for a couple minutes, cut the kernels off of the cob.
  6. Assemble the salad by placing all ingredients in a large bowl and then squeezing 1/2 a lime on top or topping with your favorite dressing.  Enjoy!

IMG_0109